

The Wrapper Link extension in Atomic Elements allows you to make entire sections, containers, columns, or widgets clickable by applying a custom link to the selected element. It helps improve website navigation and user engagement by turning complete content areas into interactive links without requiring any custom code. With easy setup and flexible linking options, you can create a more intuitive browsing experience while maintaining full design control. This documentation will guide you through how to use and customize the Wrapper Link extension in Atomic Elements.
Enable the Wrapper Link Extension #
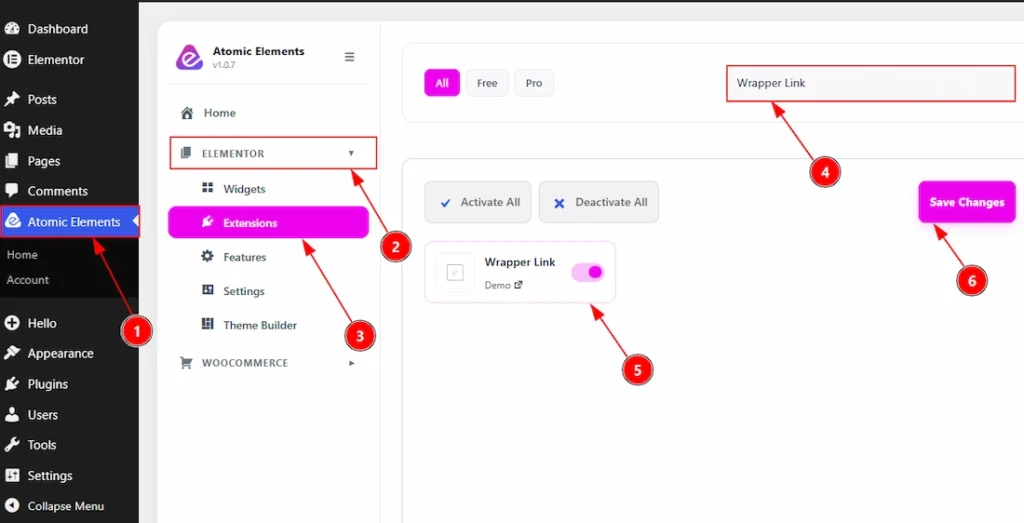
To use the Wrapper Link Extension from Atomic Elements, first, you have to enable the extension.
- Go to WordPress dashboard → Atomic Elements Plugin dashboard.
- Then, click on the Elementor Tab and the sub items will open.
- Then, Click the Extensions Tab.
- Search for the Wrapper Link Extension.
- Enable the Wrapper Link Extension.
- Hit the Save Settings Button.
Place to Find the Wrapper Link Extension #

To get the Wrapper Link extension, you must need to select any element, that can be widget, section or any container. Follow the below steps –
- Select any widget/section/container where you want to use the wrapper link extension.
- Go to Content Tab of the selected element.
- Below you will see the option named Wrapper Link & here you can customize it.
Configure the Wrapper Link Extension #
The Wrapper Link feature works with the existing content on your page. For this demonstration, we’ll use a sample content section to show how the feature works for the widgets, column & container.
Using Wrapper Link in widgets #
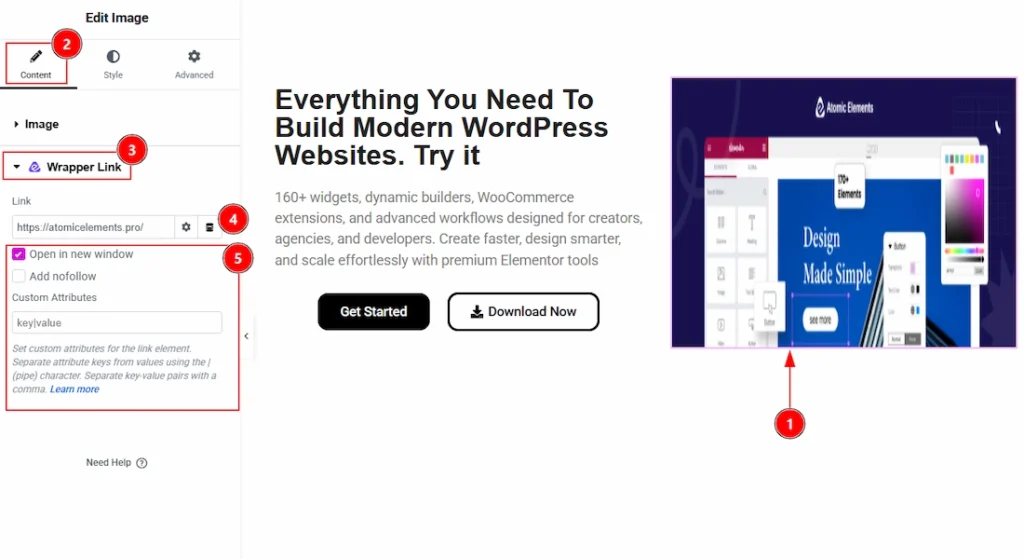
1. Click on the Image widget to select it as we have used this widget to show an example to you.
2. Now, go to Content Tab of the image widget.
3. Now, go to Wrapper Link option that placed in the Content Tab.
4. Add the link that you want to apply to the image widget.
5. Now you can select the options as per your needs. The options are –
- Open in New Window: When enabled, the linked section or widget opens in a new browser tab instead of the current tab.
- Add nofollow: Adds a nofollow attribute to the link, which tells search engines not to pass SEO authority to the linked page. This is commonly used for external or sponsored links.
- Custom Attributes: Allows you to add custom HTML attributes to the wrapper link element using the key|value format.
Now, the image becomes a clickable object that will redirect to the target URL when clicked on.
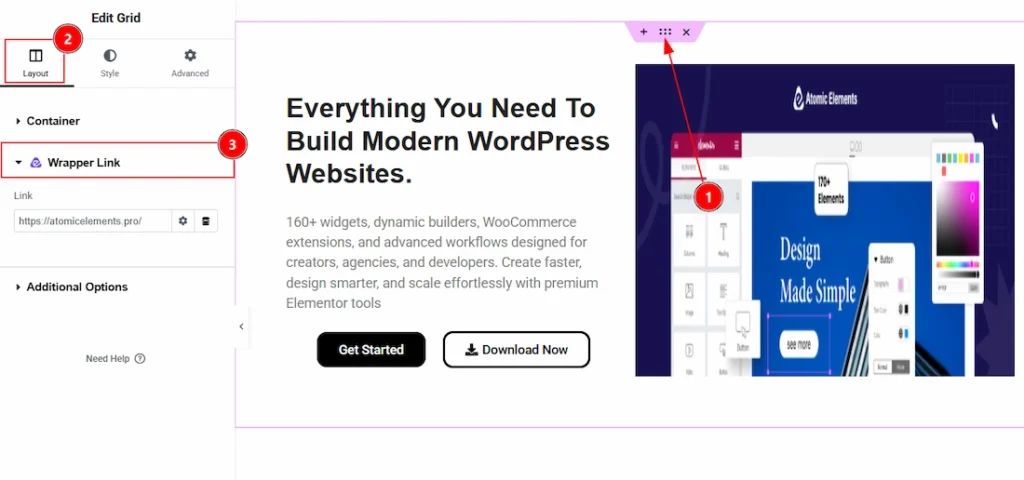
Using Wrapper Link in Column #
You can make your whole column into a clickable area by using a wrapper link inside it.
- Select the Column Container where multiple widgets are inserted.
- Go to Layout Tab → Wrapper Link
- Click on the Wrapper Link option.
- Add the link that you want to apply to the column.
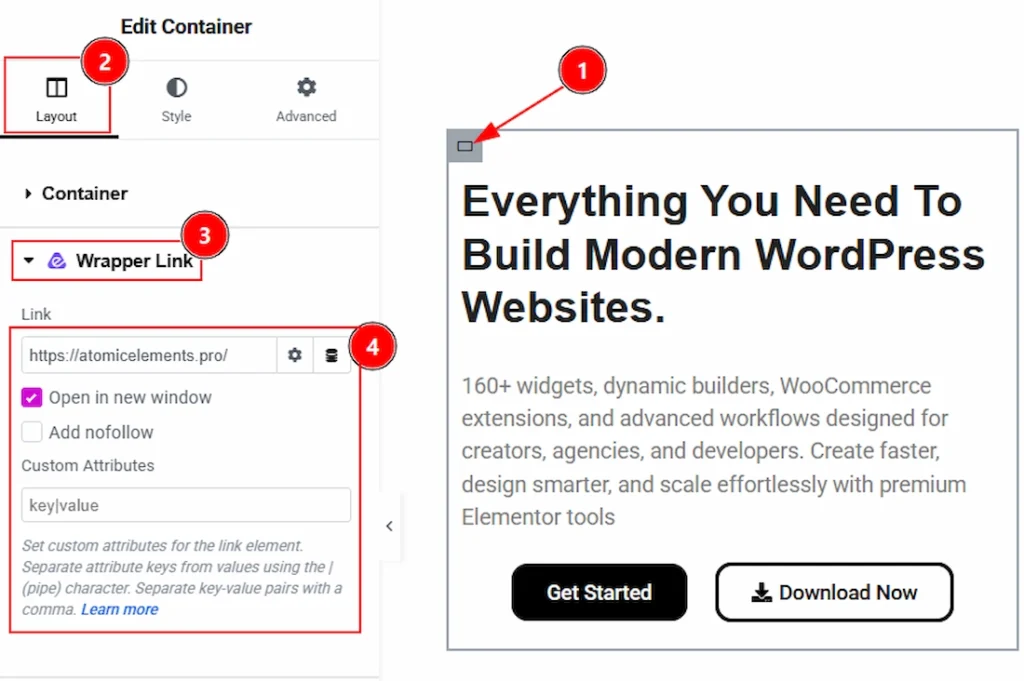
Using Wrapper Link in Container/Section #
With this, the whole section or container would show as a clickable object and will redirect anyone who clicks anywhere within the section.
- Click on Edit Section
- Go to Layout Tab → Wrapper Link
- Paste your link and save settings
Additionally, you can select the Open in new window option, the Add nofollow option, or use the Custom Attribute field.
Video Tutorial #
You can also watch the video tutorial to learn more about the Wrapper Link extension.
Thanks for being with us.