

The Custom CSS / JS extension in Atomic Elements allows you to add custom CSS and JavaScript code directly to your Elementor sections, containers, and widgets without editing theme files. It provides greater control over your website’s appearance and functionality, enabling you to apply custom styling, animations, interactive effects, and advanced scripts to specific elements. With an intuitive setup and flexible customization options, you can easily enhance your website and create unique user experiences tailored to your design requirements. This documentation will guide you through how to use and customize the Custom CSS / JS extension in Atomic Elements.
Enabling the Custom CSS / Js Extension #
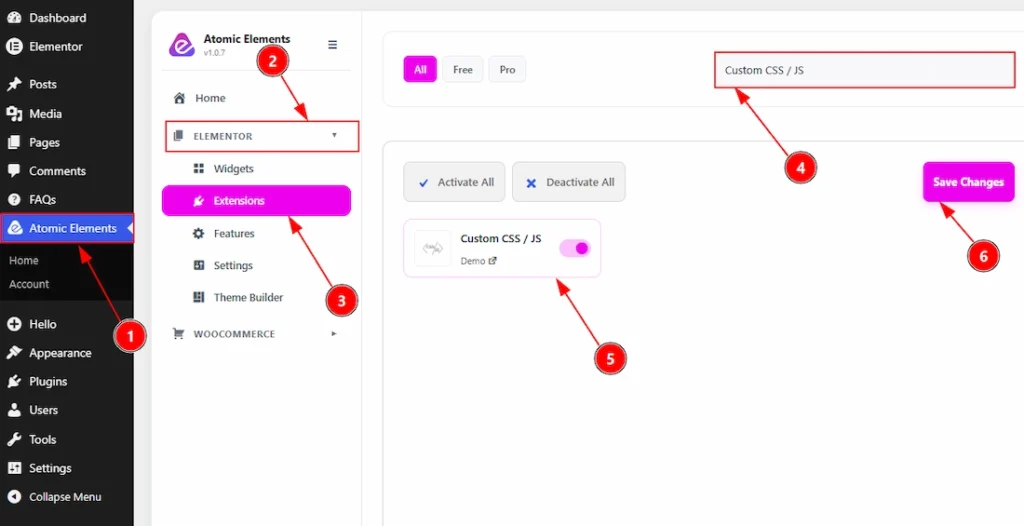
To use the Custom CSS / Js Extension from Atomic Elements, first, you have to enable the extension.
- Go to WordPress dashboard → Atomic Elements Plugin dashboard.
- Then, click on the Elementor Tab and the sub items will open.
- Then, Click the Extensions Tab.
- Search for the Custom CSS / Js Extension.
- Enable the Custom CSS / Js Extension.
- Hit the Save Settings Button.
Place to Find the Custom CSS / Js Extension #

1. To find the extension, you must need to open a page with Elementor Editor.
2. After that, on the top left you will find the page settings option. Click on that option to open the page settings.
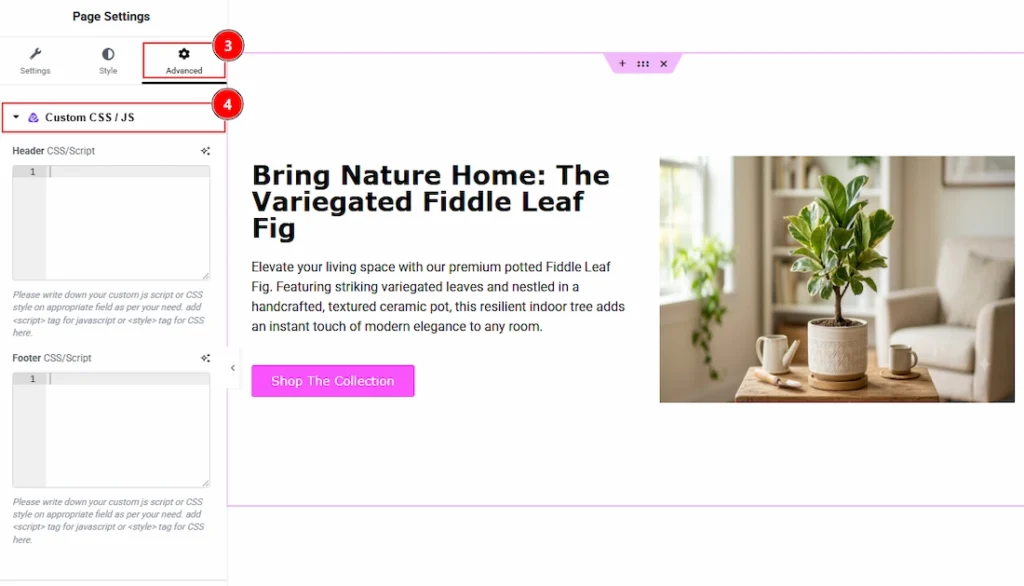
3. After the page settings open, then click on the Advanced Tab of the Page settings.
4. Now, in this field you will find the Custom CSS / Js extension section.
Configuring the Custom CSS / Js Extension #

1. In this field you can add custom CSS and JavaScript code directly to your Elementor elements without modifying theme files. It helps you extend design and functionality by applying custom styles, animations, interactions, and scripts to specific sections, containers, or widgets. With flexible code integration options and easy configuration, you can create unique and advanced customizations tailored to your website’s needs. Here we have added to code to create a support logo and text to this page. Now, let’s publish the page and see what we have got –
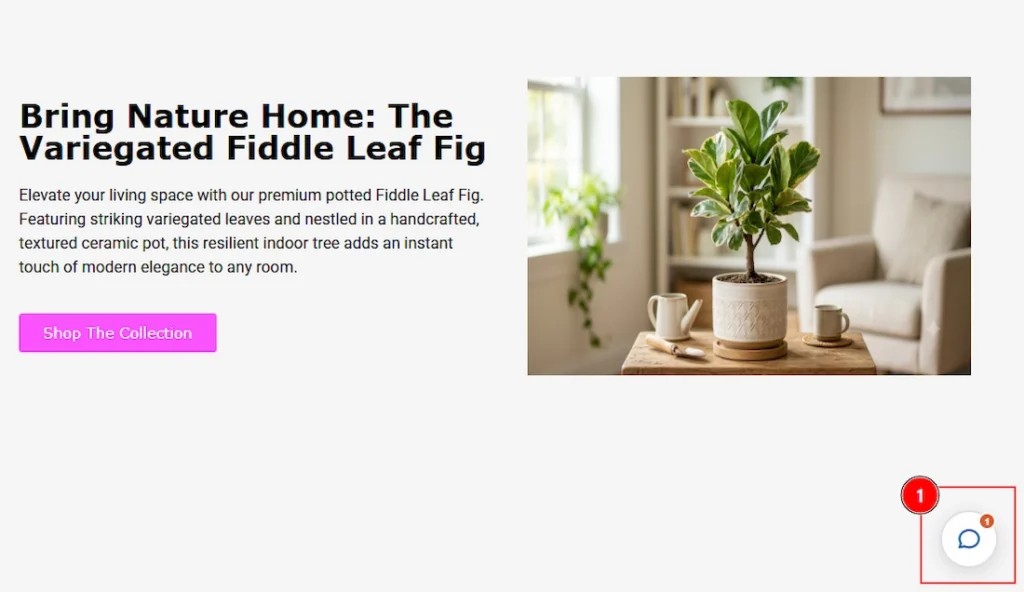
While previewing the page after published we can see that we have received a visual of chat support along with text, as per our provided code. In this way we can change and modify anything so easily.
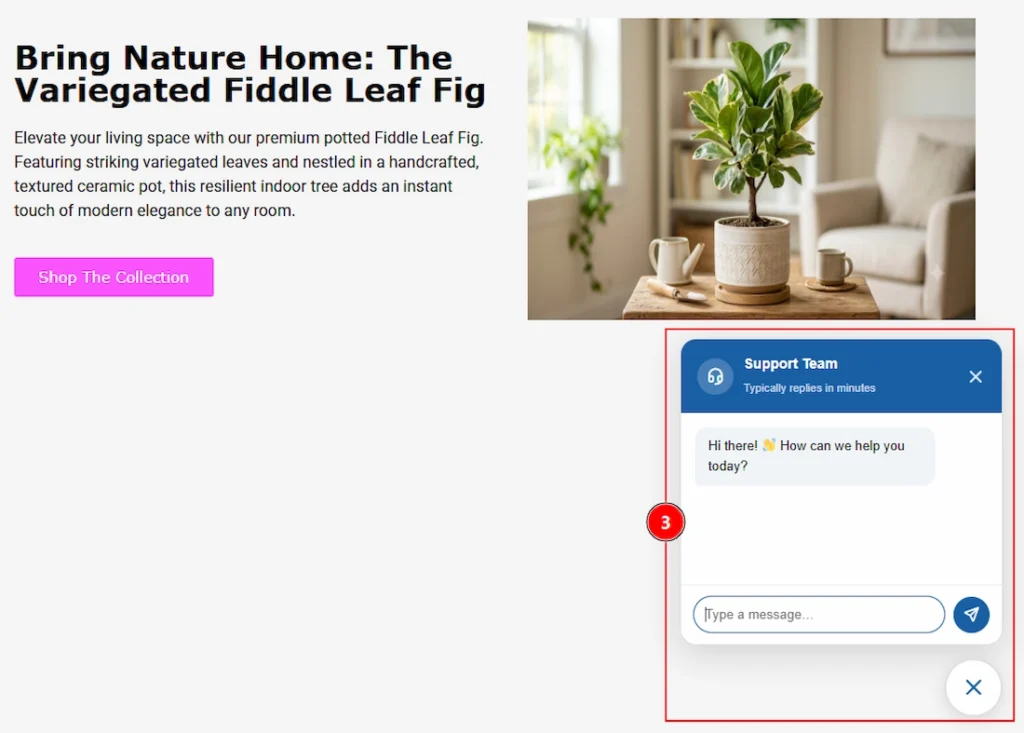
Click on the icon and you will get to see the proper chat box that you just created using the custom css / js extention.
All done, You have successfully customised the Custom CSS / Js Extension on your website.
Video Assist #
You can also watch the tutorial video about the Custom CSS / Js Extension. Please visit the demo page for examples.
Thanks for staying with us.