

This documentation will guide you to learn the process to Install and Activate the Atomic Elements plugin free version on your WordPress site step by step.
What is Atomic Elements? #
Atomic Elements is a WordPress Website Builder Plugin that augments the Elementor Page Builder with enhanced functionality through advanced widgets, WooCommerce Extensions, video effects, marketing components, navigation options, and dynamic content capabilities. It helps users to develop responsive, sleek and fully customized WordPress Websites with no coding experience, as well as improving design flexibility, user experience, and overall website functionality.
Where to Find the Free Plugin? #
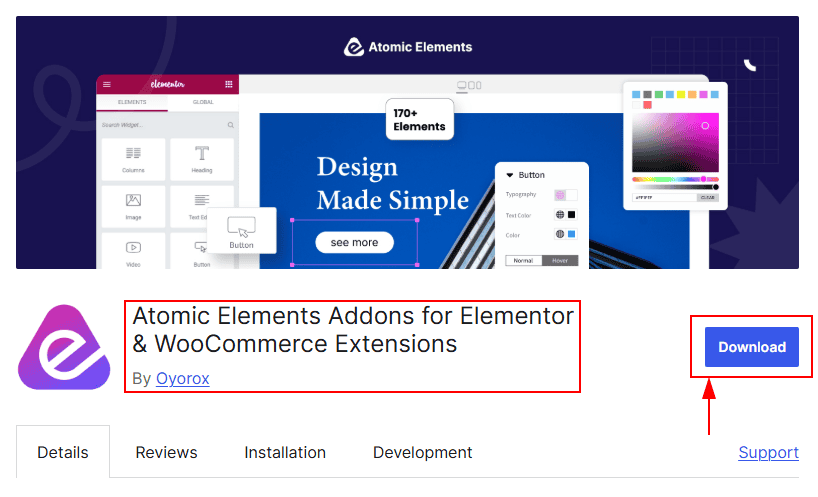
To use the Atomic Elements plugin, you need to download the plugin first. You can easily find the plugin on the WordPress.org site. Go to the site and search for the Atomic Elements and then download the plugin. To make it more easier for you we have attached the download link here. Just visit the link and click on the Download button/ Here is the DOWNLOAD LINK. After downloading the plugin you need to install the plugin on your site and activate the plugin.
What is Needed To Use The Atomic Elements Plugin? #
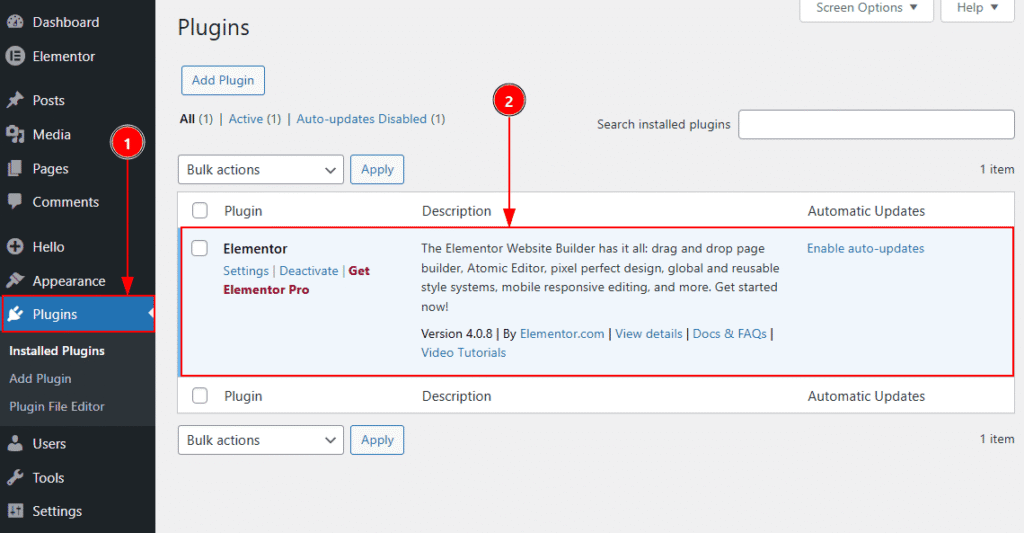
To use the Atomic Elements, You must need to add the Elementor page builder first. The Elementor page builder is required to use the Atomic Elements Plugin. So, you need to install the Elementor to your site first –
1. Navigate to WP Dashboard → Plugins.
2. Install the Elementor Page Builder and keep it activated.
Installing & Activating The Plugin on WordPress Site #
You can install the free plugin and activate the plugin on your WordPress site by following two different methods. Let’s start describing the methods one by one.
Method 1 of Installing and Activating the Plugin #
This method will work only if you have downloaded the free plugin from WordPress.org site. After download the plugin, Go to WordPress Dashboard → Plugins Dashboard and you need to follow the below steps –
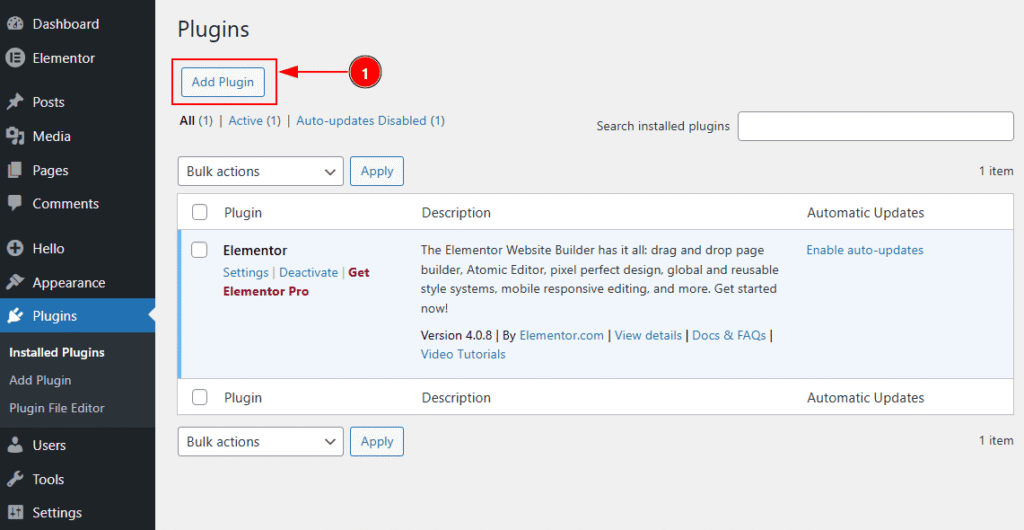
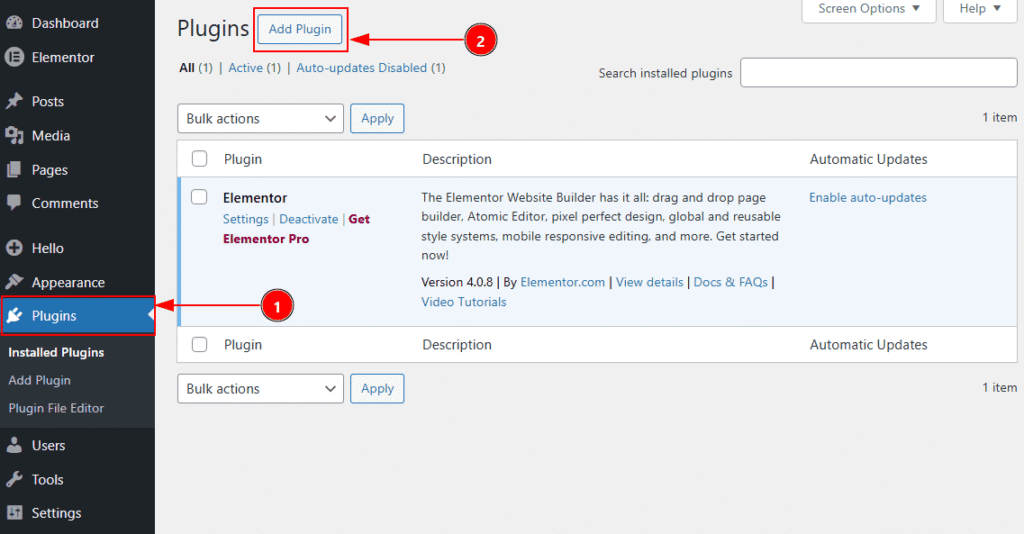
1. Click on the Add Plugin button to add your downloaded plugin of Atomic elements.
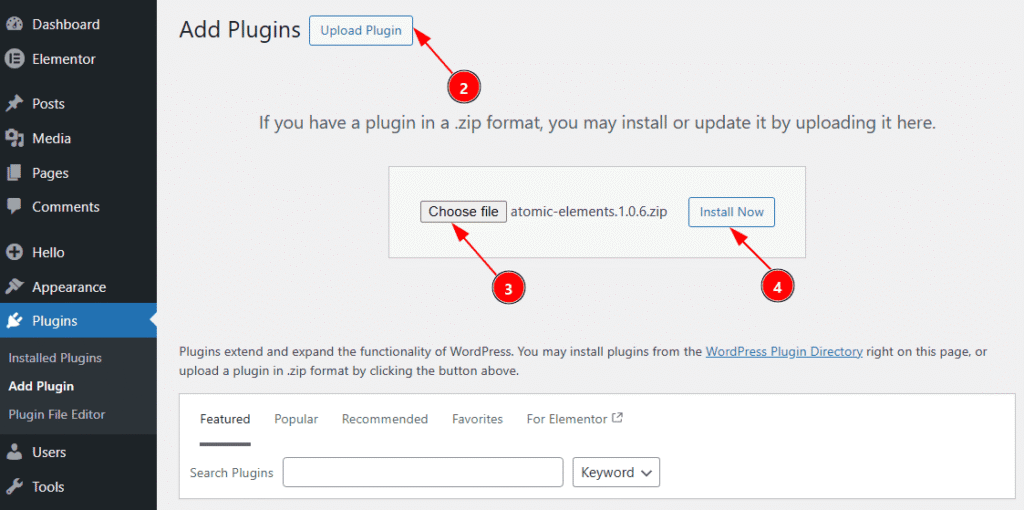
2. Click on the Upload Plugin button to upload the plugin file that you have already downloaded from wordpress.org site.|
3. You need to click on the choose file button to get option to select the downloaded file from your local storage.
4. After select the file, the name of the file will appear and now click on the Install Now button to install the plugin.
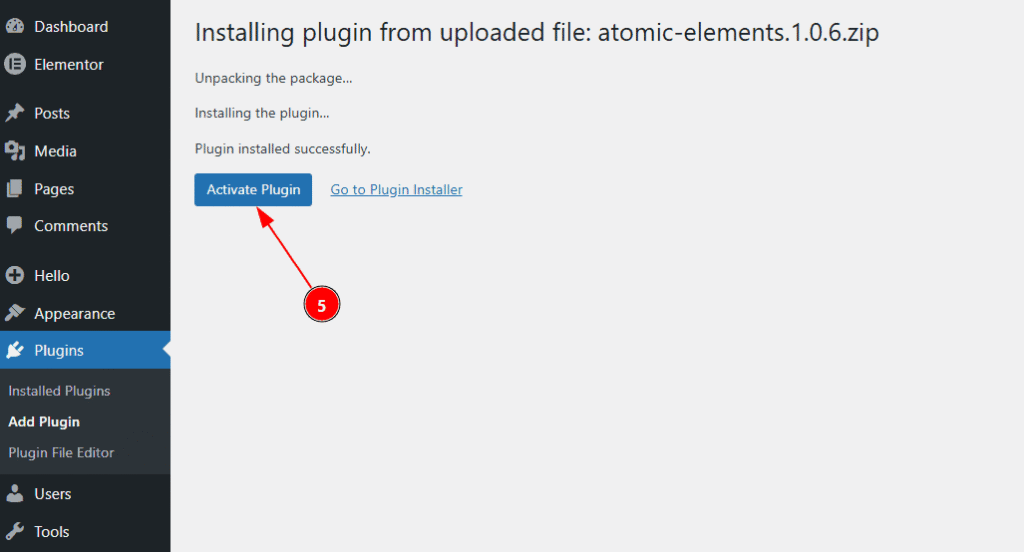
5. After clicking on the Install now button the plugin will install and you will get to see this Activate Plugin button to activate the plugin. You need to click on that button.
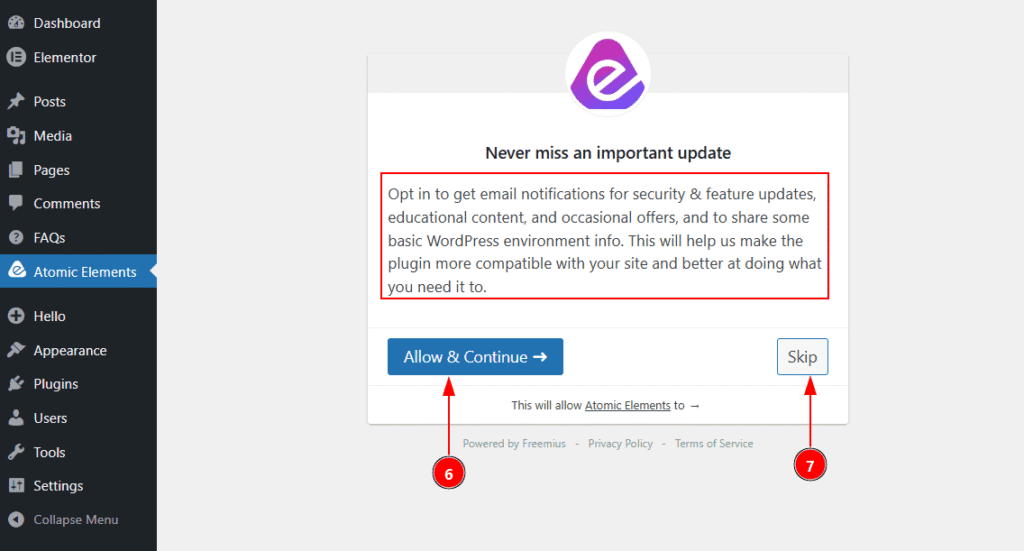
After that a pop-up will appear where you see the notice of getting email notification for the update of the plugin –
6. Click on the Allow & Continue button to agree with the notification alert of the updates of Atomic Elements Plugin.
7. Click on the Skip button to not allow of getting email notification alert of the updates.
Then, the plugin will activate instantly and then redirect you to the Atomic Elements Dashboard.
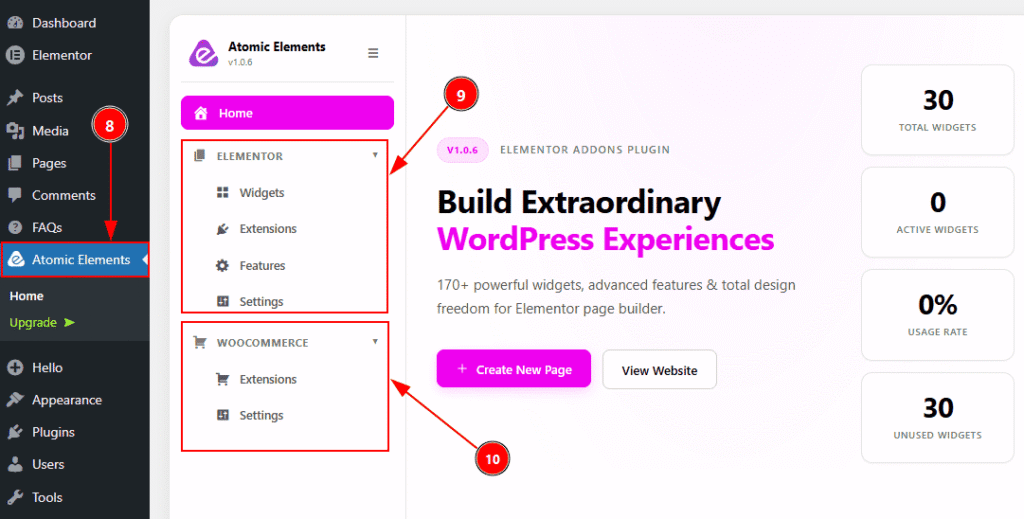
8. You can see the Atomic Elements in the sidebar of WP Dashboard and from here you can navigate to the Atomic Elements Dashboard. The main home page contain basic information about the plugin.
9. As the plugin has two parts, Elementor & Woocommerce. In this field you will get to see the Elementor functions like widgets, extensions, features & settings. Click on each tab to get into that and you can set those up as you want.
10. As the plugin has two parts, Elementor & Woocommerce. In this field you will get to see the Woocommerce functions like extensions & settings. Click on each tab to get into that and you can set those up as you want.
Method 2 of Installing and Activating the Plugin #
In this method, you don’t need to download the plugin file from wordpress.org site. Instead of downloading the plugin file you can install the plugin on your WP site. To do that please follow the below steps –
1. Go to WordPress Dashboard → Plugins Dashboard.
2. Click on the Add Plugin button to add the Atomic elements plugin.
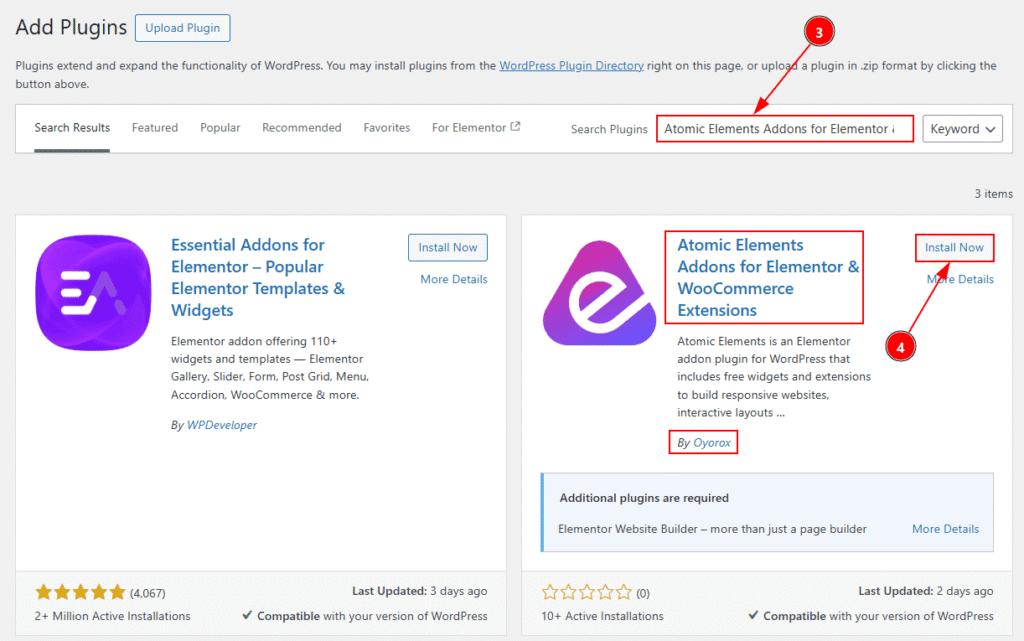
3. In the search field, type the name of the Atomic Elements Plugin and you will get the plugin information below.
4. Select the right one by checking the name (Atomic Elements Addons for Elementor & Woocommerce Extension) & Author (By Oyorox), after that click on the Install Now button to install the plugin.
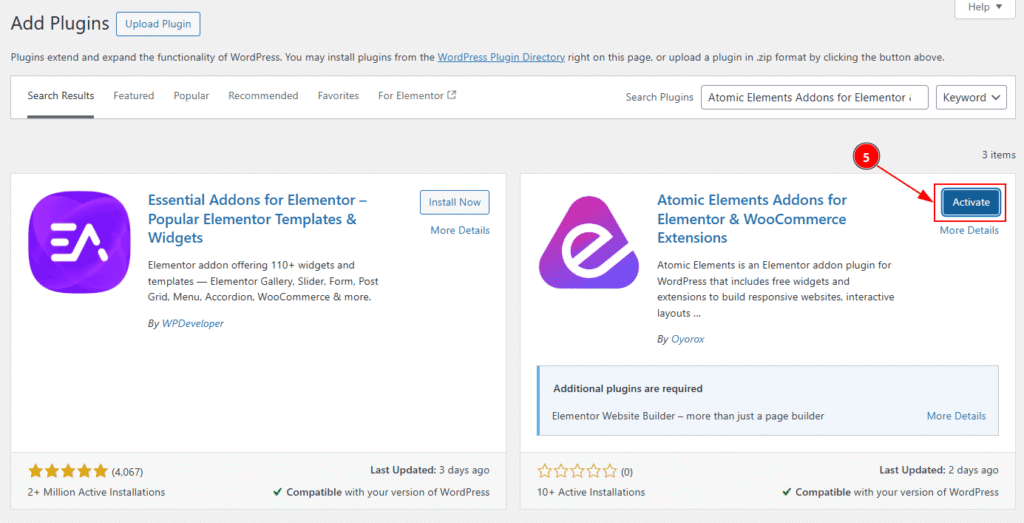
5. After installed successfully, the plugin will ask you to activate it. Click on the Activate button to complete the activation process.
After that a pop-up will appear where you see the notice of getting email notification for the update of the plugin –
6. Click on the Allow & Continue button to agree with the notification alert of the updates of Atomic Elements Plugin.
7. Click on the Skip button to not allow of getting email notification alert of the updates.
Then, the plugin will activate instantly and then redirect you to the Atomic Elements Dashboard.
8. You can see the Atomic Elements in the sidebar of WP Dashboard and from here you can navigate to the Atomic Elements Dashboard. The main home page contain basic information about the plugin.
9. As the plugin has two parts, Elementor & Woocommerce. In this field you will get to see the Elementor functions like widgets, extensions, features & settings. Click on each tab to get into that and you can set those up as you want.
10. As the plugin has two parts, Elementor & Woocommerce. In this field you will get to see the Woocommerce functions like extensions & settings. Click on each tab to get into that and you can set those up as you want.
All Done, you have successfully installed and activate the Atomic Elements free version on your WP site.
Video Assist #
You can also watch the video tutorial to install & activate the Atomic Elements Addon on your site.
Thanks for being with us.