

The Animated Gradient Background extension in Atomic Elements allows you to add visually appealing animated gradient backgrounds to your Elementor sections, containers, and widgets. It helps create modern and dynamic website designs by smoothly transitioning between colors and gradient effects, making your content more engaging and attractive. With customizable animation settings, color controls, and seamless Elementor integration, you can easily enhance your website’s visual appeal without writing any code. This documentation will guide you through how to use and customize the Animated Gradient Background extension in Atomic Elements.
Enable the Animated Gradient Background Extension #
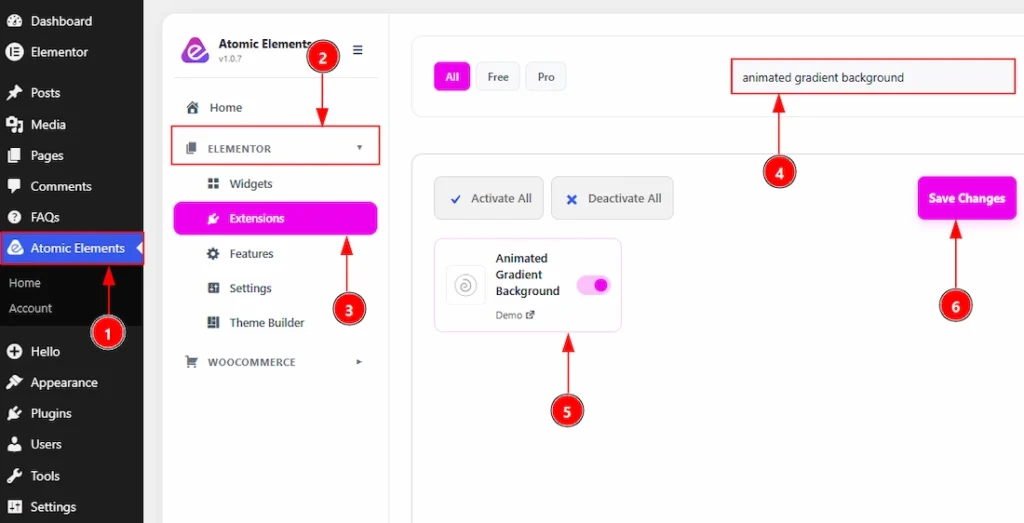
To use the Animated Gradient Background Extension from Atomic Elements, first, you have to enable the extension.
- Go to WordPress dashboard → Atomic Elements Plugin dashboard.
- Then, click on the Elementor Tab and the sub items will open.
- Then, Click the Extensions Tab.
- Search for the Animated Gradient Background Extension.
- Enable the Animated Gradient Background Extension.
- Hit the Save Settings Button.
Please note that this extension does not function inside Elementor Editor Mode. To see the final result properly, you need to preview the page on the frontend.
Place to Find the Animated Gradient Background Extension #
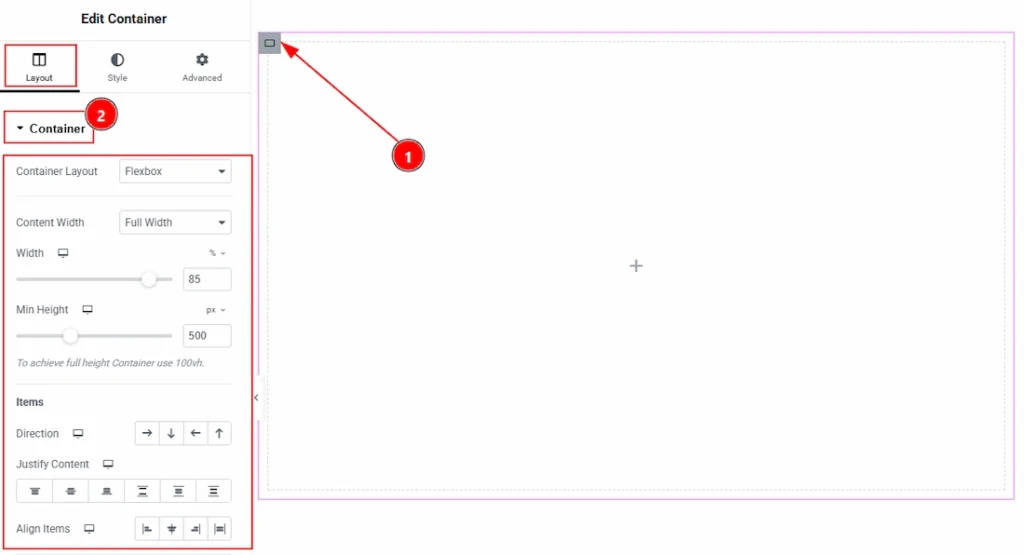
1. To find the Animated Gradient Background Extension, you must need to select a container.
2. After that complete the basic adjustment that you need to do for the container.
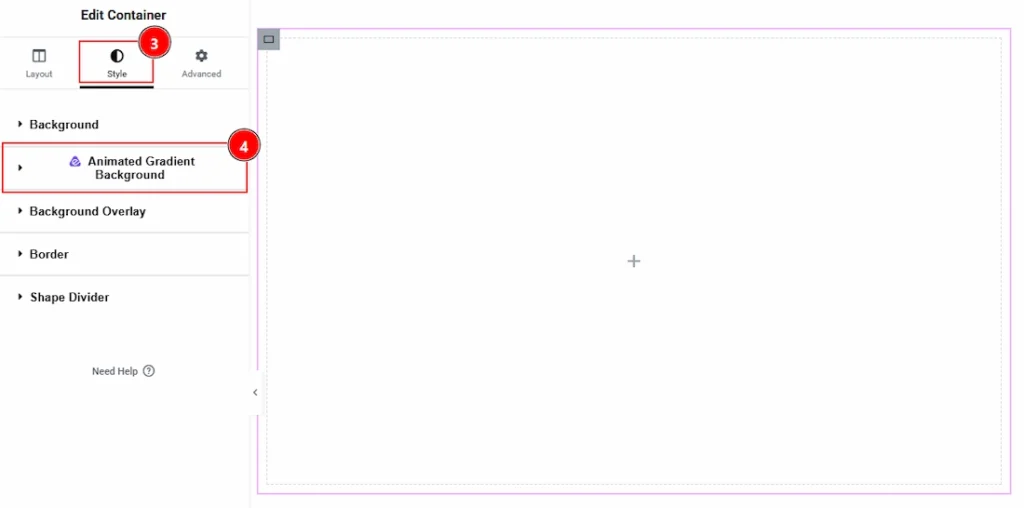
3. After that move to the Style Tab of the selected container.
4. Here, you can see the Animated Gradient Background.
Using the Animated Gradient Background Extension #
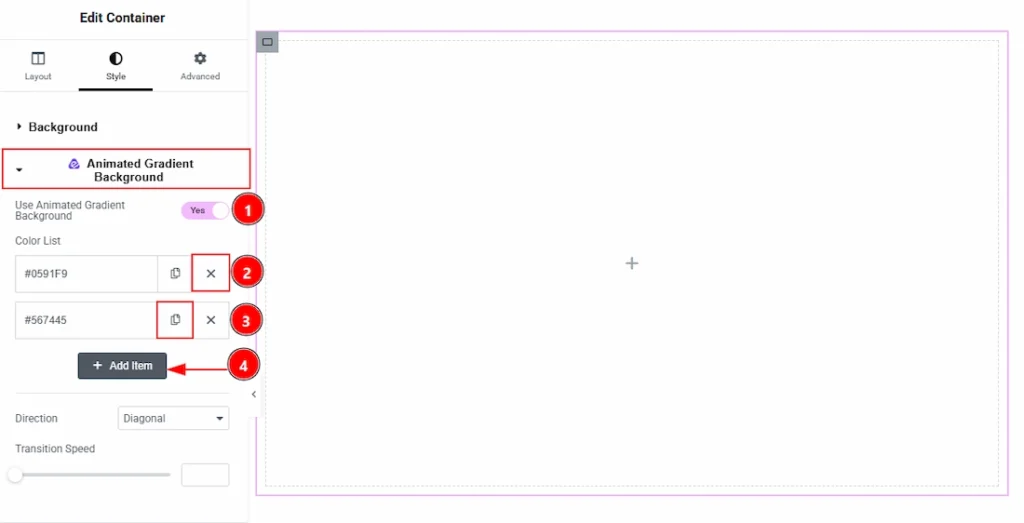
1. Use Animated Gradient Background: You can enable the switcher to turn on and get more option to setting up the Animated Gradient Background extension.
2. Close Icon: You can click on this close icon to delete the item.
3. Copy Icon: You can click on this copy icon to duplicate the item.
4. Add Item: You can click on this button to add more item.
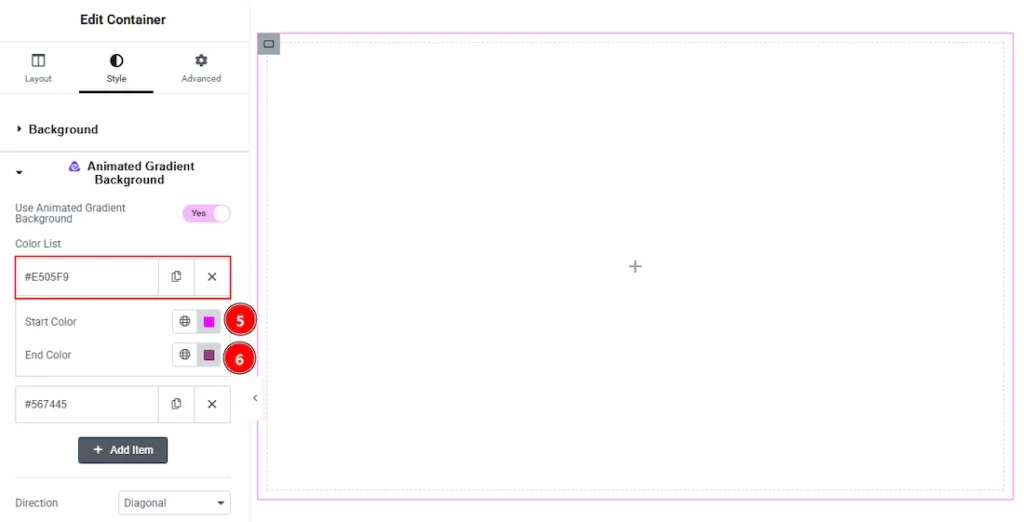
In the each item, you will get more option. Let’s see what we have here –
5. Start Color: You can select the start color of animated gradient background with this option.
6. End Color: You can select the end color of animated gradient background with this option.
Preview #
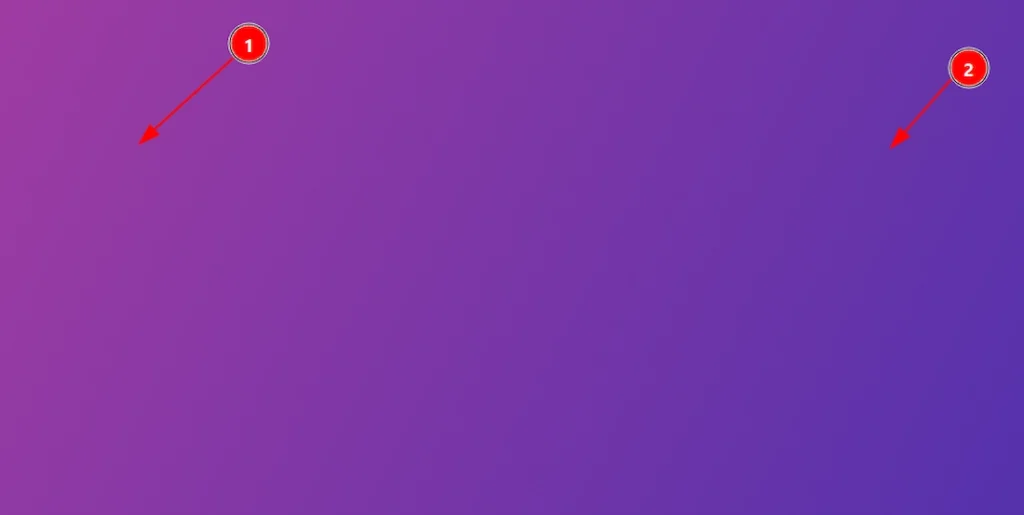
1. You can see the end color here. As we have keep the direction of color as Radial so it’s in the middle.
2. You can see the start color here. As we have keep the direction of color as Radial so it’s appearing by surrounding the middle place.
Now, let’s back to customization –
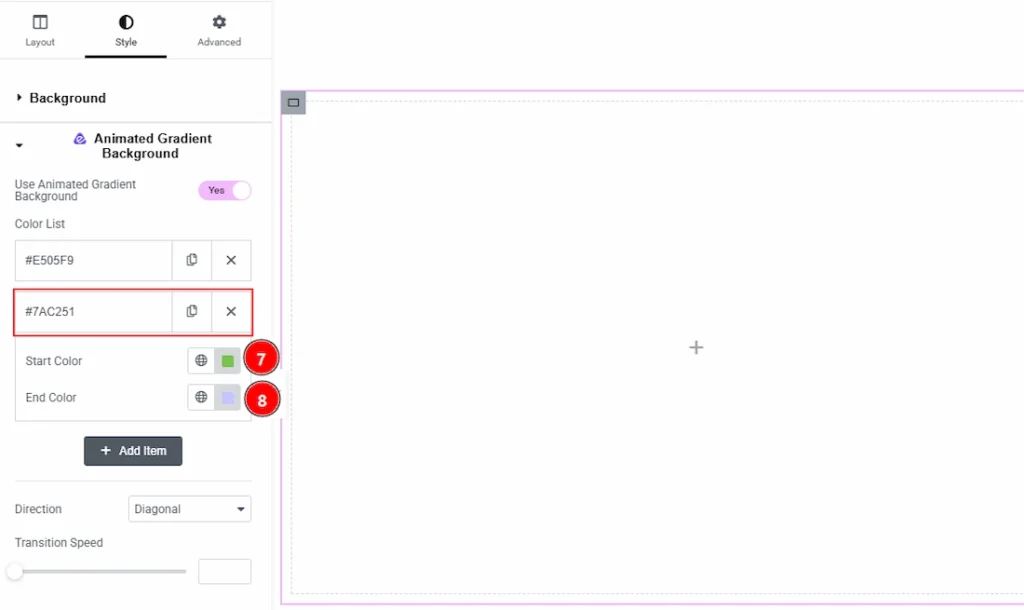
7. Start Color: You can select the start color of animated gradient background with this option.
8. End Color: You can select the end color of animated gradient background with this option.
Preview: #
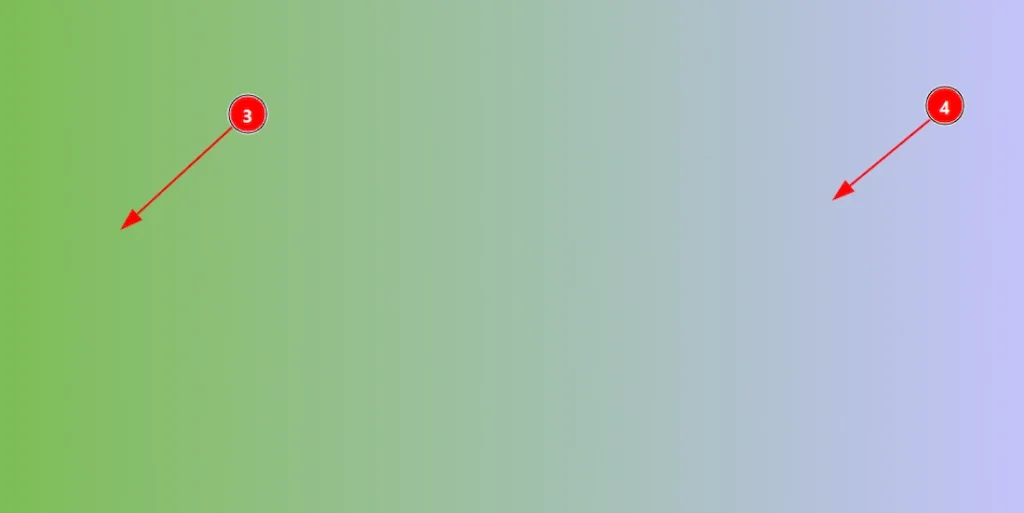
1. You can see the start color here. As we have keep the direction of color as left right so it’s in the left.
2. You can see the end color here. As we have keep the direction of color as left right so it’s in the right.
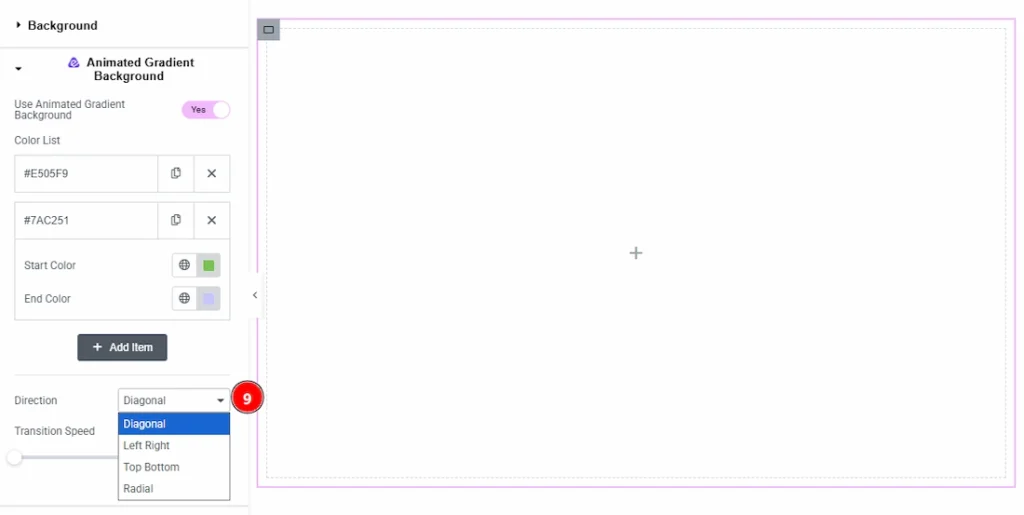
9. Direction: You can set the direction of the animation in this field. The available directions are – Diagonal, Left Right, Top Button & Radial.
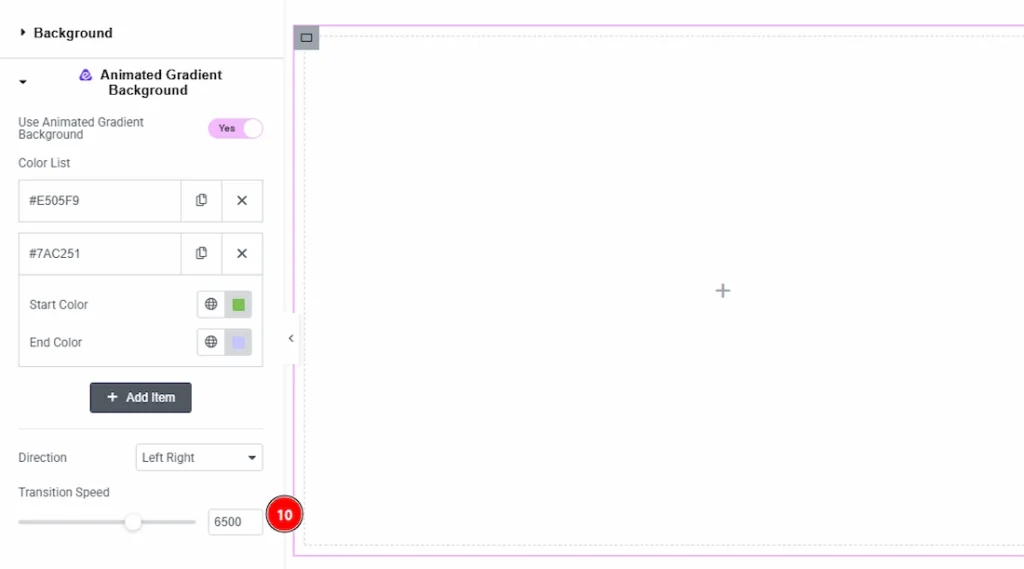
10. Transition Speed: You can adjust the animation speed of the background with this option.
Final Preview on Frontend #
This is the view of Animated Gradient Background as per the upper settings. You can go with your needed one.
All done, You have successfully customized the Animated Gradient Background Extension on your website element.
Video Tutorial #
You can also watch the video tutorial to learn more about the Animated Gradient Background extension.
Thanks for being with us.